What I learned from teaching Fluid Mechanics 1
Published 2025-12-11
Introduction
During my PhD at UWaterloo, I had the opportunity to teach ME 351: Fluid Mechanics 1 (Winter 2024). Teaching this class was one of the most enjoyable experiences of my PhD. I put a lot of effort into teaching this class. My research productivity basically ground to a halt during this semester, but it was so worth it. I learned so much about teaching during this experience. I had a chance to apply the concepts I learned while doing UWaterloo’s Fundamentals of University Teaching Program. But most importantly, I learned that I LOVE teaching! I’m writing this blog post to:
- Reflect on my first experience teaching an engineering class
- Showcase some of my assignments, tutorials, and the class project so that other lecturers can build off of these ideas
- Show that students LOVE it when an engineering class is authentic!
Summary of resources I’d like to share
- Web browser Lattice Boltzmann Method simulator that you can use for various demos.
- My interactive seminar on dimensional analysis, and the TA instructions for this seminar.
- My course project: project description, project resources, and video explaining the project.
Lectures
Lectures are the core way that content is delivered in most engineering courses. I kept a highly structured approach to the lectures:
- Review of key points from last lecture (slide) (~1-2 minutes). In one slide, I screenshotted key formulas and summarized the previous lecture in a few bullet points.
- Context of today’s lecture (slide) (~30 seconds) (where are we in the course?). Most lectures involve zooming in quite closely on a concept. But I find it’s so helpful for students to see the context. Where are we going with this? Where have we been?
- Motivating the current lecture, and learning objectives (slide) (~1 minute). More about this in the next section.
These ~3 minutes contextualizing the problem are important for student retention, and to bring student focus into the room. They have a million assignments, problems, things they’re doing later, etc. Taking 3 minutes to welcome them in and focus them is important. You’d want someone else to extend the same courtesy to you :).
- Actual lecture content (handwritten notes).
- Handwritten notes and diagrams. Students greatly prefer when you handwrite the notes alongside them in class:
- “Professor McConkey clearly cares about getting the lecture material across (WRITES OUT EVERYTHING. PERFECTLY!).”
- “I really liked how he physically wrote notes down instead of flashing PPT slides”
- Videos and visualizations. Almost all of the concepts we cover in engineering classes have real-world applications - show them! It’s a nice way to break up the lecture, encourage questions, and spark curiosity. For example, this video showing Froude number scaling is so motivating for a dimensional analysis and similarity lecture. Students will sit through your annoying Buckingham-Pi examples if they’re convinced it’s an important topic!
- There is fantastic web browser-based Lattice Boltzmann Method simulator that you can use countless times when teaching fluids. For example, I used it to teach material derivative and boundary layers.
- Active learning via Menti. For example, this Menti session on Reynolds Transport Theorem. When I started using Menti, the students were very happy. It’s a win-win: they get to participate, and I get to check their understanding.
- “The amazing notes that the process would walk through during class and the menti collaborative sessions
- “Videos, diagrams, examples and menti polls made the classes engaging and really helped me learn”
However, there are some things I learned about Menti:
- Yes, students will troll you. This is especially true the first few times they get the opportunity to write something on the screen. However, I found that the novelty kind of wears off. I was teaching a third year class, so they’re also a bit more mature. Also, remind the students that if they just want to troll, we’ll just go back to boring old lectures. Nevertheless, I usually tried to stick to multiple choice and slider-based questions.
- Yes, it takes time out of the lecture. However, I can almost guarantee that your time is much better spent with some thoughtful Menti slides/interactive questions, rather than droning on with another derivation. We’re trying to build student intuition. How do we know if the students are intuiting if we’re just talking at them?
- Demos wherever possible. For example, I did a demo of a siphon, including analyzing the flow rate quantitatively. I brought in a pitot-static probe to show around for the lecture where we first learned about static, dynamic, and stagnation pressure. These are engineering students! They want hands-on, real-world stuff.
- Handwritten notes and diagrams. Students greatly prefer when you handwrite the notes alongside them in class:
Learning objectives
Backward design involves first asking the question: “What do I actually want students to be able to do?” and then working backwards from there to answer: “What am I going to teach?”. Learning objectives are the answer to the first question. We should be clearly laying out the learning objectives for the students.
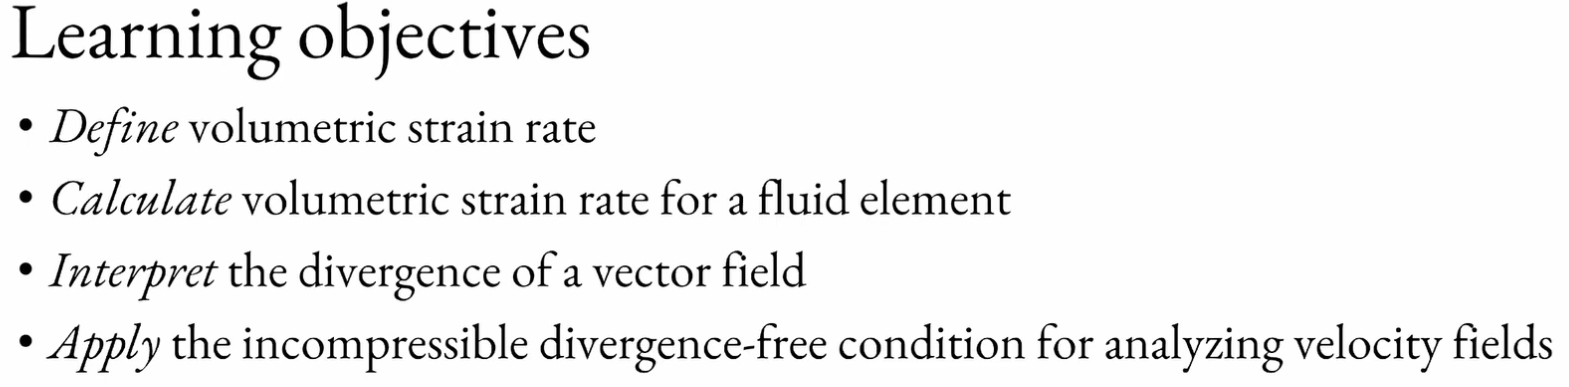
Here’s an example of learning objectives, from this lecture on volumetric strain:
I listed learning objectives at the start of all my lectures. Yes, it takes time! But, you save time in the long run. I found that it’s easy to design lectures when you have a clear list of what you’d like the students to be able to do by the end of the lecture. Learning objectives should involve a verb from Bloom’s taxonomy, be measurable, and contextualized. This gives students a roadmap for the lecture. It shows them what they should be looking out for during the lecture.
Here’s what the students had to say about learning objectives, in reponse to the question “what helped me learn?”:
- “Defining what we would learn at the start of every lecture”
- “He included learning objectives at the start of each lecture and a recap of the previous lecture’s learning objectives, which was very helpful.”
- “Each lecture had key learning objectives and the lessons were refined and thought through.”
Seminars
I re-structured the course seminars to be interactive, rather than having the TAs copy out practice problems. For most of the seminars, I had students do a short problem set, and submit it at the end of the seminar. In order to facilitate this, I had success with the following design philosophy for the seminars:
- Low stakes. I took the best 7 of 10 seminars, worth 10% of the overall grade.
- Collaboration allowed. Everyone could work with their friends and discuss the problems. However, everyone needs to submit their solution.
- Lots of help from the TAs. The TAs were instructed to provide a lot of help for the students.
- Generous and fast grading scheme.. I had the TAs assign either 100%, 75%, or 50% for each seminar. This way, a single TA could mark all ~100 submissions in an hour. Most students got it right, or were close (100% grade). If students got it wrong, but still attempted the problem, they got 75%.
I would do it this way again in a future course.
Some seminars involved active learning. For example, here’s a seminar I did on dimensional analysis, that involved role-playing as engineering consultants with the TAs as the client (instructions I gave the TAs). This was really successful! The students had fun learning in an authentic setting. I attended this seminar to see how it went, and the vibe in the room was great.
Q: Don’t students get annoyed with graded tutorials?
A: You’d be surprised. Here’s what my feedback said at the end of the course:
- “I like the tutorials, they force me to stay on top of the course content.”
- “The top 10 tutorials I have ever had - are each of the 10 Fluid Dynamics tutorials I had. Good feedback, timed well with course material, graded, challenging, they were all fantastic.”
- “The tutorials and practice questions made me feel very confident while writing the midterm”
- “Weekly tutorials helped motivate me to study and keep up with the course material, as well as providing a sample of what to expect during the assessments”
- “The tutorials were very helpful”
- “Tutorials were very helpful, it helped me stay on track and the TAs were amazing”
- “engaging tutorial format”
- “If you teach again, please keep having graded tutorials. Even if they’re weighted very little, it keeps people on track.”
Field trip
I took my class on an afternoon field trip to RWDI, a local wind tunnel facility. Obviously, students loved this. Thanks to the UWaterloo Mec E department for paying for the buses!
The class project
I also re-did the class project. I wanted to design an authentic project that mirrors the type of analysis done in the real world. By the end of Fluids 1, students are able to do basic pipeline hydraulic design. The full project description is available here, and additional project materials are available here. Here is the gist of it:

I made a short YouTube video explaining the project to the students as well.
Here was my design philosophy:
- Authentic. Students feel like they’re doing real engineering (i.e., what they signed up for when they enrolled in an engineering program).
- Open-ended, with constraints. Mirroring real-world engineering tasks, there are so many different ways to accomplish the project. However, there are still important constraints that need to be followed.
- Clear, reasonable deliverables. In my full project description, you see that I clearly tell the students what they need to include in their report, and how long each section should be. This was very well-received. When I was a student, I remember some groups submitting 30 page reports for a project, while some groups only submitted 3 pages. This was all due to unclear expectations. This doesn’t make sense. I learned to keep expectations clear.
- Motivate exploration of the topic with bonus marks. As you can see above, I created a competition which motivated the students to not only complete a basic hydraulic design, but optimize it. The competition part of the class injected a lot of energy into the project. I would definitely do this again.
The students loved this project! Here’s what they had to say:
- “The project (designing a piping system) was the most important thing I learned. Very similar to how design problems are presented in industry, the project outlined key constraints and code requirements. I enjoyed how we had to consider all aspects of a real-life pipeline design such as water and road crossings, and project costs.”
- “most important thing learned: Application of concept into real life scenarios through the project.”
Conclusion
In summary, my first teaching experience taught me to
- Record lectures
- Post slides ahead of time
- Handwrite notes in class
- Provide learning objectives for each lecture
- Provide a practice midterm and final
- Use visualizations, demos, and interactivity in lectures
- Incoporate interactive/active learning-based seminars
- Encourage authentic assignments and projects that tie course concepts to real-world engineering problems